Monday, October 17, 2022

Santa and Friends (again!)

I can't get enough of doing that night sky with the Oxide inks (if you look back a few posts, you will see I did this same technique on several Halloween cards)!  It is just so easy and quick and I love the effect I'm getting! 
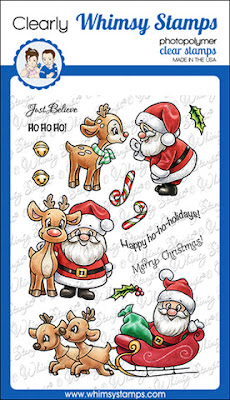
This time I coloured my Santa and Snowman with Copic markers exclusively (no coloured pencil this time).  The trick with the super dark colours (I used RV99 on the deepest darkest parts of Santa's suit and hat) is to dip the tip of the marker into a tiny pool of blender solution first, real quick, just to keep the marker solution from making a thick shiny pool on top of the card stock. Also, the right card stock is important because it needs to be made to accept alcohol markers without causing them to bleed all over the place.  My fav that I use all the time is Hammermill Cover Copy 100 lb. 
Once I coloured my main image, and trimmed my paper to the size I wanted for my card, I die cut a circle to mask where I wanted the moon to be.  I also stamped off a second image on copy paper to make a mask for Santa and the snowman.  With both of those areas masked off, I was ready to begin the night sky. 
I started with a 100 black Copic marker to darken the outer edges of the sky.  I was planning on covering over with Oxide inks, but I find they are not as dark as I was going to want for my sky, so putting a layer of black underneath helped to darken it to the degree I wanted.  I avoided a ringed area around the moon in order to keep that area lighter and brighter and really intensify the moon glow. 
Then I used Distress Oxide Ink Black Soot and Chipped Sapphire for the darkest areas, again, avoiding the circular area closest to the moon.  For that area close to the moon, I used Speckled Egg.  Before removing the masks, I sprinkled some Copic White off the end of a small round paintbrush by tapping it gently until I had filled up the sky with sparkling stars, or, if you want, snowflakes - can't decide which one it is, and that's ok, I just love how it looks either way!
After I peeled off the masks, I used YR30 all over the moon, then drew in the craters with some cool light greys (I used a photo of the full moon to guide me).
The word Believe is one of my fav new word dies from Whimsy and it's going to see a lot of traction this season!
Product links below and remember that I do get compensated if you purchase one of the images I have created for Whimsy, and also if you follow my links to make a purchase, so thank you in advance if that's you!


Thursday, October 13, 2022

Santa And Friends

I have another sample from the Santa And Friends set to show you today!  This one is my daughter's favourite from the bunch, so it will be her card this year (Shhhh!!).  I coloured Santa, snowman and stars using Copic markers first,  and put a yellowish glow around the stars with Copic YR30 , and Y11 on the stars themselves.  Then I made a mask to do the sky and glow around the stars. - I used some Oxide inks for the dark sky; Chipped Sapphire and Blueprint Sketch and sponged them on with sponge daubers.  I sprinkled on some more stars while it was still masked using Copic white on a paintbrush. Any acrylic white paint will do the trick too. 
After that I removed the mask and added a layer of coloured pencil on top of Santa and snowman to really smooth it out and deepen the darkest shadows. I also used a white coloured pencil to make some beams of light coming off a few of the stars.
For the backdrop, I used  a sheet from my fav winter paper pack, "Blurry Flurries" and to decorate around the image, I used a few snowflakes from the Elegant Snowflakes And Border die.
Links to all these products below, and thank you in advance if you follow the links to the store and make a purchase because I get compensated, so thank you if that is you!


Tuesday, October 11, 2022

Santa's Magic

It's that time of year again!  I'm starting to build up my Christmas card stash and having so much fun doing so!  Today's card features the newly released (as of Oc 2022) Santa's Magic.  I coloured up a whole scene around the image using mostly Copic markers but also some Prismacolor coloured pencil (in the sky and on the image itself).  I put so much into the details of this scene that I thought it didn't need any other decorations.  The final touch was some Copic White off my paintbrush for the stars in the sky and the swirly snow flourishes. I learned something about applying Copic White to coloured pencil though - it sits on top of the wax from the coloured pencil, and so it gets wiped off if you so much as touch it!  So note to self - no more Copic white on top of coloured pencil! I'll have to tell the recipient not to touch the stars! 
 Link to the new stamp set below, and as always, I do get compensated if you purchase one of my images and also if you follow my links to make said purchase. Thank you in advance if that is you!


Friday, October 7, 2022

Kicking Up Leaves

This is "Kicking Up Leaves", an image that really portrays my favourite happy place of all - an autumn walk beside a horse - in this case, a wee foal!  I absolutely LOVE autumn, it invigorates me, makes me feel alive, and thrills my heart with the beauty that is all around me! The colours are too numerous to count - every shade of green with every shade of yellow, orange, red against a bright blue sky - nothing is more breath-taking to me! A forest walk gives me the best feeling - I just can't even describe it, and unless you have done it yourself - you don't know what you're missing! The smells are wonderful too, with so many natural scents in the air.  Autumn is amazing, its only flaw; it doesn't last very long! 
Anyway, the images and dies from Whimsy made this card easy and fun to make.  The image itself, "Kicking Up Leaves" is a digital image that you can purchase and download and use today if you want! I coloured it first with Copic markers, followed by coloured pencil.  I enjoy doing that process. The leaves were made by first sponging some Oxide ink colours onto white card stock and then die cutting them out of the colourful paper I had made.  I used "Mustard Seed", "Carved Pumpkin," and "Candied Apple". 
Product links below - and please note that I do get compensated any time you make a purchase by following one of my links or purchasing one of my images in Whimsy's product line! Thanks for stopping by!


Wednesday, October 5, 2022

Halloween Cat

I'm so excited about these Halloween cards I have been making! I just love creating this spooky night sky and spotlighting the main image to make it really pop against the dark background.  I started by colouring in the main image using Copics, and then followed up on the cat and pumpkin only with coloured pencil, to really deepen the shadows and smooth it all out. I hand drew the background trees with black Copic marker. Then I masked the cat and pumpkin and used 2 Distress Oxide inks and some sponges to create the dark sky - Chipped Sapphire and Shaded Lilac.  The shaded lilac makes a bit of a misty appearance and really lightens the black of the trees to a medium grey.  While the mask was still on, I sprinkled on the stars using a small round paint brush with a bit of Copic white on the tip of it.  It doesn't take much! I put die cut bare trees on top of all the layers as a finishing touch.
A close-up and all product links below if you are interested (I get compensated for any purchases you make through my links, so thank you if that is you!). 
Thanks so much for visiting today!


Monday, October 3, 2022

Halloween Magic 2

I'm on a roll with these Halloween cards and it feels amazingly fun!  I just love the look I can get using the Distress Oxide inks to make a foggy night scene card.  It's rather easy too, which makes it even more fun! I coloured the image from the Halloween Magic Clear Stamp set with Copics first, and hand drew the trees and wood planks with the Copics too.  I was going for the look of a picnic table; however, I don't think I got the perspective right, and so it looks more like a fence? I suppose it could be either, but next time I will get some reference photos to get it right! Anyhoo, after I drew in the trees (in black) and hills (using YG93, 95, 97) behind the characters, I left the sky un-coloured because I planned on using the Oxide inks to colour up the sky.  The great part is that it makes everything appear misty and foggy, which only adds to the spooky mood!  After everything was coloured up with Copics, I went over the main characters with coloured pencil to really deepen the shadows, brighten the colours, and smooth everything out.
I masked the image and picnic table before sponging on the Shaded Lilac, Blueprint Sketch, and Chipped Sapphire Oxide inks.  Then while still masked, I sprinkled some Copic white onto the sky for stars using a small paintbrush and tapping it gently to get it to speckle like that.  
I added a few of the die cut trees from the Tree Assortment Die Set over top at the end, as I really thought it looked cool! I just used a Zig Glue pen to glue them on.  The letters were from a retired alphabet die set at Whimsy Stamps. 
Product links below, and thank you for your support - if you click on my links and make a purchase, I get compensated, so thank you, if that's you!
Thanks for stopping by today!


Sunday, October 2, 2022

Halloween Magic

I'm really getting into the Halloween spirit this year and have made some cards that I will send to the Grands!  I am excited about making moonlit foggy scenes, which is a lot easier than you might think with the right supplies.  Here's how I did it: 
I stamped the witch from the Halloween Magic set onto white card stock suitable for Copic markers.  I coloured the image with Copics and then used  Prismacolor Pencils to deepen shadows and basically enrich the colour even more.  
Once that was done, I took one of the circles from the Stitched and Pierced Circle Die set and cut out a circle to help make my moon.  I laid my die cut circle over top of the witch image and used it to lightly trace the outline for my moon, then set the die cut aside (to use later as a mask). Then using photos found online of the full moon as my guide, I used YR30 to colour over the whole moon and then some light warm greys (W0, 1) to make the markings of craters and spots. 
I fussy cut the whole thing out and then prepared my background on a fresh sheet of white card.  I started by drawing some naked trees with a black Copic sketch marker.  Then I temporarily adhered my circle mask where I wanted the moon to be. With the mask on, I used Distress Oxide Shaded Lilac and a sponge dauber to get that misty glow look around the moon, but left the 2 upper outer corners blank.  I blended Distress Oxide Chipped Sapphire out from there and filled in the top corners with that darker ink.   I used Shaded Lilac on the bottom quarter of the card to give it a bit of a horizon glow down where the trees were. I also really love how it lightens the black trees I had drawn in, and makes them look like there's a mist all around them!  I went back and forth with these two inks until there was a seamless blend between the two, leaving that ring around the moon to be mostly Shaded Lilac so that it would look nice and bright.  
I cut out a second mask for the witch image and laid it over top of the image so that I could sprinkle in the starry sky.  I used Copic white on a small round paintbrush with just a bit of the Copic white on the tip and  tapped the brush until I had enough "stars". 
It was time to take the masks off, and then make the tree silhouettes for the foreground. For those I used Tree Assortment Die Set and some black card stock.  They went on easy peasy with my Zig glue pen. 
I had such a blast making this card! Products used with links are below (and remember I get compensated for any purchases you make through my links, so thank you in advance if that is you!). 
Thanks for looking!


Saturday, October 1, 2022

Wizard In Training (Dragon image)

I have been having fun with Halloween cards that I'm going to mail out to the Grands! The first thing I did was print out Whimsy's Haunted Halloween Digital Scene and colour that in with Copic markers.  I used YG93, 95 and 97 on the hills, Neutral greys, 5N and 4N for the road and pathway up to the house, and black for the tree trunk/branches, with some Y13 in the windows of the house as well as a bit on the grass to show the glow of the lights shining just below the house.  I left the sky blank because I was planning to use Distress Oxide Inks for the sky. I used Chipped Sapphire Distress Oxide ink on the top portion of the sky, and Shaded Lilac on the lower half, and it gave a misty, foggy appearance, and it also toned down all the greens of the grass, which is perfect for a spooky night scene!   
I printed the scene again on paper and cut out a mask.  Once I adhered the mask with liftable tape, I was able to create a starry sky using Copic White, which is very much like what I used to use (when I was in High School!) to cover typo's, White Out, or Liquid Paper as they were called back then.  I just used a wee bit of the Copic White on a small paint brush, and tapped the brush as I held it over the card, to get it to sprinkle the stars into the sky.  
For the main image, I used the sleeping dragon from the Wizard in Training set that came out recently. I had coloured it and fussy cut along the lines as closely as I could.  The colouring was first done with Copics, but then I followed that with some coloured pencil to deepen the shadows and draw on the scales. The pumpkins are die cut from Whimsy's Build A Pumpkin Patch Die set.  I coloured them with Copics (Y17, YR04, 18, E07, E19) first, and then used some coloured pencil again to darken the shadows, and I used black Copic to hand draw the faces. I made the sentiment strip by lining up some letters from the Boho Alphabet set. I had stamped it on white paper using Black ink, but thought the letters would look better if I coloured them orange.  I also coloured in between the letters so that it would blend in to the scene. 
The little sign that says "Boo" is from Gnome Trick or Treat digital image that I  printed and fussy cut. 
Once I adhered all the images to the card, I used a really dark pencil crayon to draw in the shadows underneath the dragon and pumpkins, assuring they would appear as part of the scene. 
I had a lot of fun with this one! I added a close-up and all the product links in case you want to purchase any of the Whimsy Products for yourself, and remember that if you use my links to make a purchase, I do get compensated, so thank you in advance, if that's you!

Thanks so much for popping by!