Showing posts sorted by relevance for query Kitty. Sort by date Show all posts

Tuesday, August 15, 2017

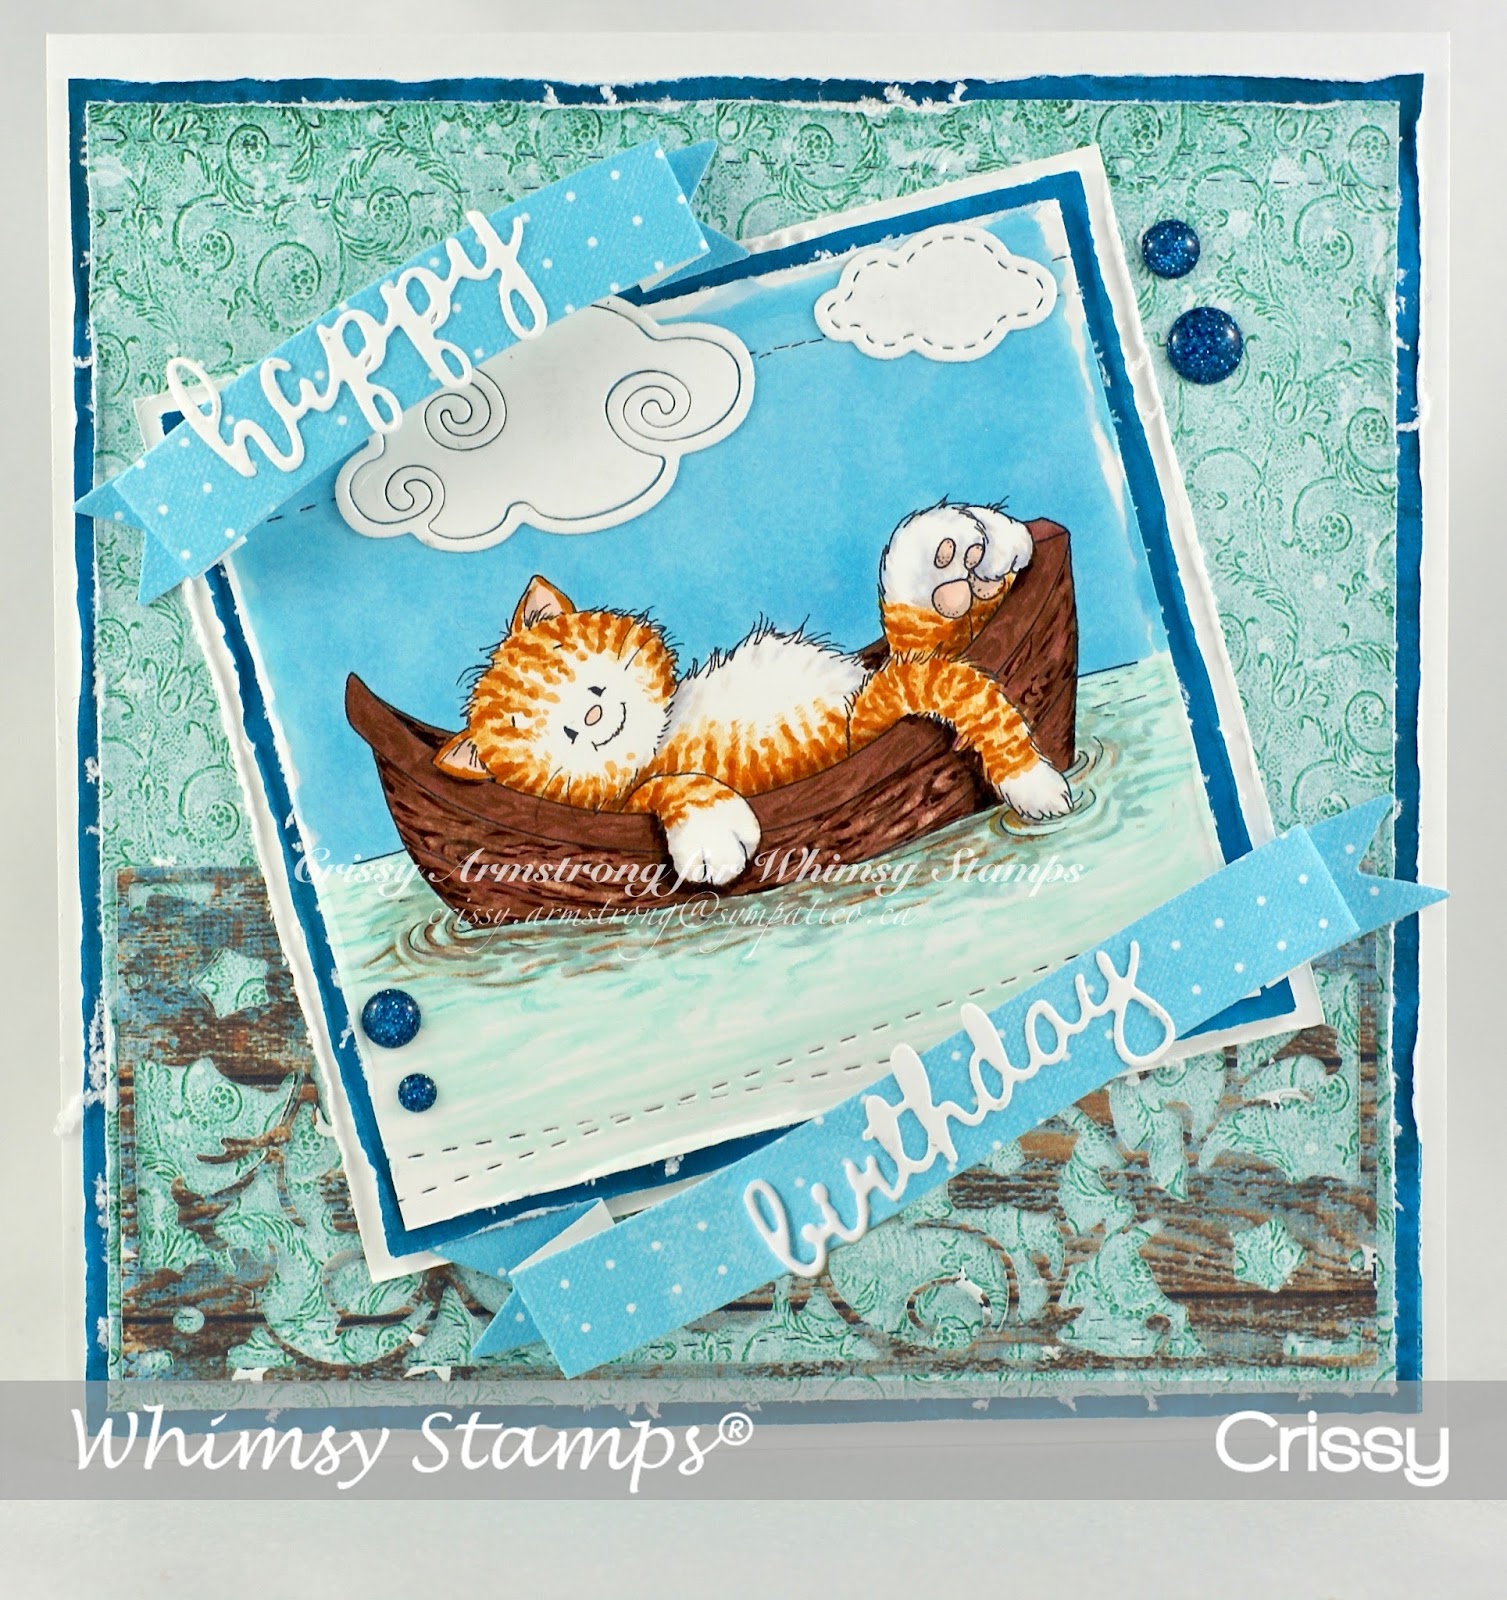
Kitty Floats

Hi People! How's your summer been?! Ours has been nice and cool.  No heat waves! That is my kind of summer! Plus with all the rain, we have had a good blueberry year! The ground is blue in places!
This is "Kitty Floats" and this card is my offering for this month's Whimsy Inspirations Challenge, which is Anything Goes/optional: Dots. If you join in, you get a chance to win a Whimsy gift certificate! You must use a Whimsy image or paper on your card to qualify, but, they always have some on hand for FREE to anyone (no purchase necessary!) so no one is left out of the challenges!
They also have a customer appreciation stamp set available (a different one is offered each month) as a bonus if you do spend over 75$ on your order! 
I coloured my kitty with Copics:
Oranges: YR12, 07, 14, 18, 27, 39
Wood: E13, 15, 18, 19, 29, 0 blender
Sky: B01, 02
Water: BG000, 00, 10, 11, 32, 70, 72, with E13 and 15 for the boat reflection
Whites: E40, 41, C1, 2
Pinks: R30, V90, 91
Enjoy the rest of your summer, like my kitty here, just relax and watch the clouds if you can! It is therapeutic!
Hugs all!
Crissy

Wednesday, November 26, 2008

Watercoloring with markers 2

I spread the last layer of green with a slightly damp brush.


I wanted to deepen the shading on Callie, so I added a second, darker shade of beige.


I spread it with the damp brush.


Next I added a slightly darker shade of brown. Notice that for the darker shades, I put down less of the ink color.


After I blended that third shade on Callie, I used a very dark brown, but only a tiny bit here and there, where the shadows would be darkest, and spread it with a damp brush.


I put some pink on her cheeks.


I added a bit of pink to her ears too, and again, spread the color carefully with a damp only brush.


I colored in the tree ornaments, using the same technique, leaving a white area and pulling the water into the color and going right to the edges. I also took a periwinkle colored marker and drew some shadows on the candy canes in the white area and the red area, and used my smallest brush (damp) to blend it.


I colored over the entire area with a light blue marker for the background. I also brushed on a tiny bit of extra color in the center of the cherry pink elongated ornament. I dampened my smallest brush, and then dabbed it right on the end of the marker to pick up a bit of color, then applied it in strokes to the center of the ornament.


I spread the blue background ink with my largest brush and used a lot of water to do so. You have to be fast, or you get pooling and backwashing of the color. If you look closely, you can see some hard edges where I did get some backwashes, but I decided they actually gave the picture some character, so I left them!
I also added highlights with a white gel pen, and gave Callie two white hind feet by making fur strokes with the gel pen. I added highlights to the tree branch, the ornaments, the candy canes, and the kitty.
The image is now ready to use in a project!

Wednesday, December 21, 2022

Fixing links, and, Cat Me-Wow for Christmas

I had such fun creating this card by putting together so many little accessory images from multiple sets!  The kitty is not from a Christmas set, it's from the Cat Me-Wow set, but by dressing it up in a Santa hat and adding a little Christmas candy, all of a sudden it's the purr-fect Christmas image (pun intended!).  All of the sets and dies listed below, along with links - I didn't realize until the lovely Chrissy, a long time fan of Whimsy, wrote to tell me that my links were not working! I hope this does not happen again, and I am still in the midst of going back over my blog to fix them.  I don't know if the problem is my older operating system, or if the problem is with Blogger linking to Share-a-sale.  But what ever the reason, I will be double checking that my links are working from now on.  Please drop me a line if you find a broken one, I would hate to cause more frustration. 
These images are all coloured using Copic markers, and fussy cut - I got sore in my neck and shoulders from the time that took! But I wanted to be able to place them where ever they looked best on the card.  Plus once I added one accessory image, I soon realized t it needed another.  And then another.  And another. So I kept on adding more! ha ha
But just to show you that you can use stamps exclusively to create your scene (no need to draw if you don't want to!) I thought this would be fun to do, and it was.  It just makes me laugh to look at it!


Thank you so much for stopping by, and thank you if you make a purchase through one of my links, because I do get compensated for that, even if it isn't one of my designs.  Thank you so much for your support!


Monday, December 21, 2009

Whimsy Winner!

Here is the winner of yesterday's draw for Whimsy Advent Event!

Random Integer Generator

Here are your random numbers:

11
Timestamp: 2009-12-21 16:06:29 UTC

And the eleventh commenter was:

ribenaruby said...
Love this kitty image, beautiful colouring nd those candy canes look like marshmallows, so yummy!

December 20, 2009 11:42 AM

Congratulations ribenaruby! Please contact Denise Lynn of Whimsy stamps so she can send you "Very Present Helpers". I hope you have fun with it!

Wednesday, March 16, 2011

Blog Hop is On! Offering prizes!!


Hello and welcome to the Whimsy Stamps March new rubber release BLOG HOP!

We have 13 fabulous new Whimsy Stamps plus 2 new wonderful dies to show you today! These new goodies are available to buy right now from the Whimsy Stamps store along with all your Whimsy favourites. We also have our wonderful special guests joining us for this hop - Beate Johns, Deb Routledge, Jacque Beddingfield and Elaine Hughes!

The Whimsy Stamps DT have been sneak peeking these fabulous stamps for the past 4 days, so if you missed them be sure to hop on over to the Whimsy Inspirations Blog for some more inspiration!

Here is a full list of the wonderful new rubber stamps and dies being released today:


If you would like to participate in the hop and you didn't arrive here from Marley's blog, please CLICK HERE to return to the beginning of the hop at Crystal’s blog.

The hop starts today (Wednesday March 16th at noon EST) and ends on Wednesday March 23rd at noon EST.

For this hop we have 6 different prize draws! We have not one but TWO grand prize draws, so two lucky hoppers will win a large selection of new release stamps. Grand Prize 1 will be for those who help us advertise the hop, and Grand Prize 2 will be for those who hop along with us. Also, we have 4 mini candy stops throughout the hop where you can enter to win a new release stamp! I'm not going to tell you where they are, so if you haven't found them you'll just have go back to the beginning and start hopping! *wink*
And my blog is one of the places offering a prize!  If you add your name in the Inlinkz option at the bottom of this post, you will get a chance to win "Benny and Joon Have Cake" pictured here:
*NEW Benny and Joon Have Cake
This is a deeply etched high quality red rubber stamp that Whimsy is offering.  It comes with that cute saying stamp too that you can trim off and use however you want (or should I say "wish", heh-heh).  All Whimsy stamps come already mounted on EZ foam and untrimmed.   Be sure to enter your name, and if you don't have a blog, let me know in a comment and you'll be added at the end of the list!
For my blog hop creation I used my own illustration I call,  "Celebrate Big!"  It is sold in a set along with that cute saying that Ann created to go with it.  

I stamped "Celebrate Big!" using Versafine Onyx Black ink (it is water proof) onto 140 lb cold press water colour paper by Canson.   I coloured the image using water based ink markers, namely Tombow Pens.  Really it is just the same method as painting with water colours.  The only difference is that you can colour the ink directly onto the picture and then spread it with the water.  And the results are different too; I find the inks to be much brighter and vibrant colours than water colour paint.  You don't need Tombow Pens to do this method though; any water based ink markers will do!  I have two tutorials on how I colour like this if you are interested.  Just click HERE and HERE 
or look under my blog banner for the tabs that take you there. 
Here is your close-up:
I have entered this card into the following challenges:
So now it's time for you to continue the hop by hopping on over to Donna's blog.

Finally, here is a complete blog hop list in hopping order:


Thank you so much for hopping with us today and I hope you enjoy the new releases!

God bless each and every one of you!
Crissy

Friday, September 21, 2012

Whimsy Blog Hop and Blog Candy!

Hi Peeps!!
I've got a wee little bit of blog candy to give away!  As well as the blog candy available through the Whimsy Blog Hop, I've got my own giveaway going on!  First, here's the info for the Whimsy Blog Hop.  Below that, I've added my own instructions for entering MY blog candy draw!! 
Whimsy Blog Hop Info:
Hello and welcome to Day 3 of our September Rubber & Die Release Showcase! On Wednesday (19 September) Whimsy Stamps released this month's new rubber designs, Shapeology dies, Whimsy Designer Paper packs and Shape EZ templates. From then until 25 September the Whimsy Stamps DT and Special Guests are showcasing these fabulous new goodies with a daily mini blog hop and I am part of today’s hop!

 Each mini blog hop has a new release prize hidden somewhere along the way and you have 24hrs to enter each prize draw. To be entered into today's mini blog hop prize draw, be sure to leave a comment on ALL of the DT's posts listed below by 12.00PM EST tomorrow. All winners will be announced on the Whimsy blog on 26 September. To take a peek at today's fabulous new release creations, please click on the links below...
Remember that the entire new release is available to buy right now from the Whimsy Stamps store along with all your Whimsy favourites. Thanks for stopping by and don't forget to pop back to the Whimsy blog tomorrow to view more of the new release creations!
And now, on to my creation...
Presenting "Jingle Cat"! One of four new images I have released through Whimsy Stamps! 
Coloured using the following Copics: 
Background: E81, 84, W5 as shadow
Kitty fur: C2, 3, 4, 5, V91
Eyes: YG23, 
Inside ears and nose: R20, 22, E04
Muzzle: R00, C3
Red of hat: R29, 59, 89, C5, 7
White hat trim: C3, 5, BV20, V91, E50
Gold bells: E39, 49, Y00, 15, 17, YR14, 23 
Red collar: R46, 59, C5

My Blog Candy Info: 
And now, here's one of my new stamps, "Under The Mistletoe" that I'm giving away to one lucky commenter.  Just enter your comment and name using the Inlinkz  below!!
*NEW Under the Mistletoe

Sunday, December 18, 2022

Cat Do Christmas Two (in a gift box!)

The kitty in a gift box - just looking for some love and acceptance, like the rest of us!  He's promising to be good! For two whole minutes at least!! haha
I used Copics to colour this image and then got to work on framing it with some traditional red and green. I used a sheet from "Christmas Traditions", my digital paper pack at Whimsy (so you buy it and then print them off at home).  I love being able to print papers off at will, and never running out (as long as your printer ink is full!).  I made the striped background with the rubber cling "Brushed Stripes" - such a fun and fast way to make striped paper in any colour (any colour of ink that you have on hand!). 
I get compensated if you follow the links to purchase these products at the Whimsy store, or if you purchase any of my images from Whimsy Stamps.  So thank you if that is you!  You are keeping me drawing and creating for Whimsy!


Thanks for stopping by!


Friday, January 11, 2013

Jingle Cat

Find me on FB here! https://www.facebook.com/pages/Crissy-Armstrong/133764576783604

Jingle Cat
Jingle Cat (rubber stamp at Whimsy) coloured with the following Copics:
Kitty's Fur:  C2, 3, 4, 5 V91
Eyes:  YG23
Ear: E04, R20, 22
Muzzle: R00
Red on hat: R29, 59, 89, C7, 5
White trim of hat: V91, BV20, C3, 5
Gold bells: E39, 49, Y00, 15, 17, YR14, 23
Red Collar: R46, 59, C5

Blessings of Peace to you!

Wednesday, November 26, 2008

Watercolor with markers 1

I stamped Callie Christmas Kitty by High Hopes onto Canson 140 lb. cold press watercolor paper using Versafine Onyx black ink. I have found that those brands of paper and ink are the best for this application. I like to use Tombow pens, but any water based marker will work, even Crayola! Tombow pens are a very high quality marker pen with dual tips and I love using them.
I partially colored the branch with the brightest green leaving a lot of space for the ink to flow later. I always start with the lightest color and then add graduating deeper shades, saving the darkest for last. I also spread the ink one color at a time, letting each layer dry before applying the next.


Here I have begun to put puddles of clear clean water on the white of the paper just above the colored areas. Try not to get too close to the ink or it will bleed into it.


Now start moving the brush INTO the color, not the other way around, and try to go right to the edge of where you colored. Your brush will have some color in it now, so keep that in mind as you move it across the white paper. The ink will naturally bleed into where you put the water, and this is a good thing. This is what gives watercolor art its personality!
To color the lower branch, I cleaned my brush off first before spreading this ink around, so that the white areas would stay lighter.


Here I have colored the candy canes using the same principal, always pulling the water INTO the ink and going right to the edges. I used the smallest paintbrush for those tiny areas.
I also prepared to do the first layer on the cat with a light beige.


You can see where I have begun to put a puddle of water on the center of his tummy where the paper is still white. Again, work the brush into the colored areas and go right to the edges of the stamp design.


Time for some more layers of color on the branches. I picked up a slightly darker green marker and colored in the areas where I think it should show shading.


Now this time my brush is not wet, only damp. I keep a rag next to me when I watercolor; it comes in very handy. To get the brush to just the right dampness, I dip it in the clean water, then swipe it across the rag a few times. This might cause the bristles to separate just a bit. When you see that, you know its just damp and therefore, just right to use! You can see how the brush has a lot of color in it, and that is ok. I brushed it lightly on the branches in the direction that the needles would go, in random strokes! You don't have to be really careful when using this technique, which is what I love about it. It isn't about perfection. In fact, the little imperfections is what gives the painting its unique and interesting personality!


I have let that layer dry so now I am applying the deepest darkest shade of green, to give it that added dimension. It doesn't take long for the layers to dry when your brush is only damp. It probably took all of two minutes! While I was waiting for it to dry, I used two more shades of red, a dark red and a deep wine color, and added them to the candy canes, following the same principles as I have been showing, using a slightly damp brush to blend, and working from the lightest highlighted areas into the darkest outer edges.


Again, spread the ink with very little water on the brush. This is very important, because if your brush is very wet, you will get backwash. Backwash is when the ink travels in the water puddle on the surface of the paper, and graduates to the outside edges of it, leaving a visible ring of color on your painting. A brush that is too wet at this point will also remove a lot of the color you took your time to apply. So be careful! Damp brush only when layering colors!!


I was not entirely happy with how my dark layer turned out, and so I took the brightest green that I had used on my first layer and went over it again. Its ok to do that. Water coloring is very experimental, and you can often fix mistakes or things you don't like, just by adding colors from the same family on top of one another. As long as you aren't over stressing the surface of the paper. This paper stands up to a lot of punishment! Continued on the post below:

Sunday, December 18, 2022

Cat Do Christmas 2

What kitty hasn't tried to climb the Christmas tree! It is just irresistible when you're feline!
These two fun cards came together fairly fast. I coloured them with Copics, and the star and the bauble have Wink Of Stella for some sparkle. I masked the images to lay down a nice opaque layer of Oxide ink in behind them, to really make the images pop.  I just love how they turned out!   I used the gorgeous Slimline Scenic Window die to frame up the images and sentiments.  Links below will take you to these products, and if you make a purchase by following them I do get compensated, so thank you if that's you!