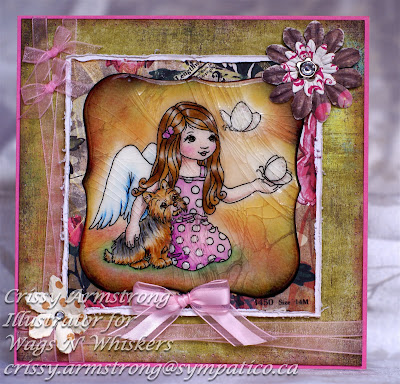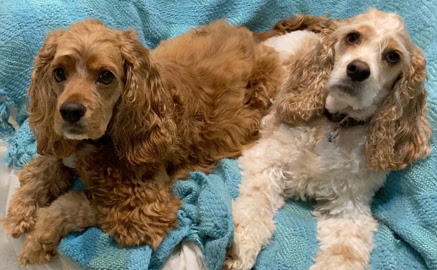
Today I am not just showing off a card. I would like to show you how to get sharper, larger photos on your Blogger blog! Just look at the difference in the photos above; I uploaded the top photo into Flickr first, and then copied the html code and pasted it in my blog post here. The second photo was uploaded in Blogger as usual, the way I have done it for a year now. I am amazed, not only at how much larger the Flickr photo is, but also how much more in focus it is. I just found out today how to do it, and I'd like to share what I found out so you can do it too!
Here are your step by step instructions:
1. Go to Flickr and click on "Create Your Account" button on the top right of the page. Follow the instructions to create your account with them.
2. Upload the photos into your new Flickr account, following their upload instructions. I clicked on "Upload Your First Photos", then "basic Uploader near the bottom of the page. You'll see options come up that look just like the options in Blogger when you are uploading photos, so you'll know what to do from there. ;-)
3. Once you have uploaded a photo into Flickr, it will show as a thumbnail in your gallery. Click on it, and then it will show up quite large on the screen. Near the top right of this page, just under the search box, you'll see "Share this" in grey print. Click on that.
4. You will then see three options in blue, in a little drop down screen. Click on "Grab the html". When the html shows up, use the cursor to copy the code. You will paste it into your blog post, but not just yet! We'll get to that in a few minutes. First, you must prepare your blog to receive the larger photos from Flickr!
5. Now go to your blog in another screen. Go to "Customize. Then go to "Edit HTML" (top left, second row of options).
6. Don't skip this next step: Go to "Download Full Template" . This will save the current template as is, so that if things go wonky, you can always go back to the way it was before! ;-)
7. Scroll down until you see the codes for the "wrappers". There were only four numbers that I had to change in order for my blog to use the larger photos from Flickr. You may have to do the same. Wrappers are the alloted spaces for your posts, sidebar, and for the whole blog. The "outer wrapper" is for the blog as a whole. The "main wrapper" is for your blog posts. My sidebar was listed simply as "sidebar".
IMPORTANT NOTE:
If you're wise, you'll do one change at a time, click on the orange "save template" button, and then "view blog" to see what your changes look like. That way you know how to go back and change it right away if you don't like it and you won't be confused as to which number made what change.
8. Let's start with the outer wrapper, which includes both your posts and sidebar together. You should see something similar to this:
/* -- layout -- */
#outer-wrapper {
width: 930px;
margin: 0 auto;
text-align: $startSide;
font: $bodyfont;
background: #fff url(http://www.blogblog.com/snapshot/bg-body_$startSide.gif) $startSide top repeat-y;
}
I am using the template called, "Snapshot: Madder". So your codes will be slightly different, but similar looking. See the third line down, which says, width: 930px; The number that was there originally was 700. I erased that and typed in 930. You can choose a different number if you like, but try mine first just so see what that does. It will widen the entire blog.
9. Now scroll down until you see something similar to this:
#main-wrapper {
line-height: 1.4;
float: $startSide;
padding: 10px 12px;
border-top: solid 1px #fff;
width: 650px;
word-wrap: break-word; /* fix for long text breaking sidebar float in IE */
overflow: hidden; /* fix for long non-text content breaking IE sidebar float */
/* Tantek hack - http://www.tantek.com/CSS/Examples/boxmodelhack.html */
voice-family: "\"}\"";
voice-family: inherit;
width: 520px;
The sixth line down, says, "width: 650px;" I changed it from 436px, which is what it had been before. I also changed the width on the last line to 520px. I cannot remember what it had been before. I only remember it was less, probably 400 or so.
10. You may want to change the width of your sidebar. It will look something like this:
#sidebar {
float:$endSide;
border-top: solid 1px #fff;
padding-top: 4px;
padding-$endSide: 0;
padding-bottom: 0;
padding-$startSide: 7px;
background: #fff;
width: 280px;
word-wrap: break-word; /* fix for long text breaking sidebar float in IE */
overflow: hidden; /* fix for long non-text content breaking IE sidebar float */
}
The ninth line down on mine has the width number. (different templates will likely have slightly different orders for these numbers, so look for the word "width"). You can choose a higher number than what is currently there and that will widen the space that your sidebar takes up.
11. Now, when you have changed the numbers to widen the spaces on your blog, and SAVED your changes, you will be able to upload your larger Flickr pictures! This editing is a one time thing so there is no need to repeat the process (unless you wish to change it again). Now, just go make a new post as usual, and... remember when we copied the html code for your first Flickr upload? Well if you did that, now all you have to do is hit "paste" in the new blog post box, and voila, your larger, sharper photo will appear!
I wish to thank Mel of "Mel Stampz" because she had a tutorial on her blog about this that showed me what to do. She is an incredible card artist too, so you really should check out her blog! You're missing out if you don't!
I'll leave you with a close-up of the Angel Whispers image and if you have any questions, I will do my best to answer them for you!
Blessings!


Crissy,
ReplyDeleteWOW thanks for the great information! You are a font of knowledge girlie!
Michelle
Thanks for fabulous tutorial Crissy. Gorgeous card, love how you've coloured in the adorable image. Hugs Michele x
ReplyDeleteanother absolutely beautiful card Crissy! I never tire of your coloring and art work!
ReplyDeleteGorgeous creation! Thanks for the tutorial too! Looks fabulous!
ReplyDeleteThis is a beautiful creation.. I love the way you used the cracked glass. I have edited my blog but now I can't figure out how to adde the picture once I copy the code. Do I pick Upload Images or do I pick Web address (URL)
ReplyDeleteHi Dawn B. Thanks for the compliment! To add the picture, just open up a new blog post window for starters. Don't bother with the add photos option in blogger. So now in another window, go to your photo in Flickr. No, you don't want to pick up the web URL in Flickr. You will want to use the HTML code instead. So go to the photo in Flickr, click on it, then click on "Share this" in grey print to the top right of the photo.
ReplyDeleteYou will then see three options in blue, in a little drop down screen. Click on "Grab the html". When the html shows up, use the cursor to copy the code. Then go back to your new blog post window, and hit "paste". It will show up right away!
Let me know if you still have problems! xx
Another stunner Crissy, So, so pretty. Awesome tut! Changed my blog and now have larger photo's and so much crisper! I would get a little annoyed sometimes as the sometimes look hazy. Really appreciate you sharing this :-) Just need to get some time to make a new banner to fit. Big Hugs, Nikki x
ReplyDeleteWhat a gorgeous card Crissy!
ReplyDeletethanks so much for the tips! I have a 3 column blog, so these numbers didn't quite work for me, but I played around with it a bit and I'm happy with it...I'll just edit my picts a bit different!
Thanks so much,
Kelly
Great tutorial. I don't use blogger for my personal blog, but will make sure we do this for the Wags 'n Whiskers blog. Speaking of which...I LOVE this card! You know how much I adore your coloring...but when it's an image of my daughter...well...what could be any better?! LOL
ReplyDeleteLove the cracked glass effect, too!
~Lacey
Thank you so much.. I love it. I made a post for tomorrow and it looks so much better.. Now can you do a tutorial on how you did your blog banner..hehehe.. I love that too.. Great job..hugs for your help.
ReplyDeleteGorgeous card. Love the colours. Thanks for sharing the tutorial ... I have also been doing exactly the same for the last 2 months or so and have so much joy with my clearer pics. Thanks for sharing.
ReplyDeleteHugs
Desire
Gorgeous card, Crissy,
ReplyDeleteI just love the cracked glass effect, the colours and papers and your colouring are so beautiful.
Great instructions for the photos. TFS.
Karen x
fabulous card Crissy, if my cards were half as good as yours then I might attempt all your instructions. Thanks for the info, I will come back and concentrate on it properly later
ReplyDeletex
Crissy - this has always bothered me too!
ReplyDeleteI use Wordpress and finally started resizing everything but still, that didn't seem to help! Wordpress is really easy to load html to, they have an html page, so you just change to it and copy and paste the flickr code into it... although what I ended up trying is I changed to the large flickr photo and downloaded it and then added the photo and I think it's better!!! Well, I just did one post so far....
Thanks so much for sharing this! I am so HAPPY to have this info!!!!
Your card is precious! What an adorable image and your coloring...ahhhh...wonderful!
Pam Going Postal
Hi Crissy,
ReplyDeleteI just stumbled across your blog and I love it. And thank you for the tutorial. I can now have bigger pics on my blog, they look so much better. However now I can't find a blog background to fit and my pics and writing are going over the edges lol. Have you got any tips on how I can fix this?
Thanks :o)
Hi Crissy, I'm so tickled that you liked this & Thanks for the link love. Your photos look fantastic! What a stunning card!
ReplyDelete